How To Send Emails Using Excel and Macros
Why would anyone want to email from Excel? Isn’t Outlook better for sending emails? The answer is that sending email through Excel can save some users a lot of time and money. We’ll show some scenarios, so this will make sense for you. By the end of this article, you’ll want to send some types of emails through Excel.
Excel is an amazing program. Off-the-shelf software often leaves you with gaps in the capabilities you need. Sometimes, those software vendors will charge you extra to fill these gaps. Excel is so flexible, it can fill many of these gaps for you.
Here we will provide some examples of how to send billing notices from Excel.
How To Send Email From Excel
The easiest way to send email from Excel is by using a formula. But you can do more with an Excel macro. First, we’ll look at a formula method.
Sending Email Through Excel — The Formula Method

In this spreadsheet, we’re sending a reminder email to everyone who’s over 30 days past due. The formula in the E column determines who will receive the email and who won’t. It is “IF((NOW()-C2)>30,”Yes”,”No”).”
The formula in the H column provides a personalized message for whoever is receiving the email. It’s the “body” of the email. The “subject” of the email is the G column.
We send the email by clicking the hyperlink in the F column. The formula for the hyperlink is “HYPERLINK(“mailto:” & B2 & “?subject=”&IF(E2=”Yes”,$G$2,””) &”&cc=george.jefferson@jeffersoncleaners.com”&”&body=”&IF(E2=”Yes”,$H2,””) & ” ” &$H$7, “Send email”).”
If we click the link on the row where Edith is the recipient, the following Outlook email window pops up.
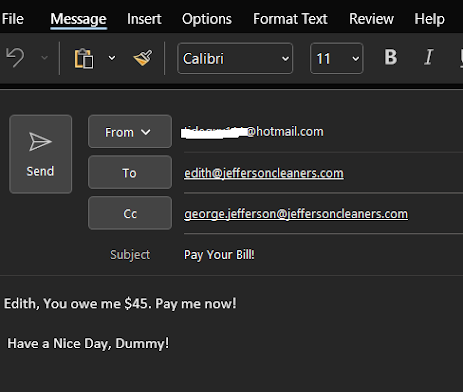
Edith is over 30 days behind, so the nudge column says “Yes.” But Archie is less than 30 days behind. His nudge column says “No” meaning he shouldn’t get an email. If we click his hyperlink, we get the following result from Outlook:
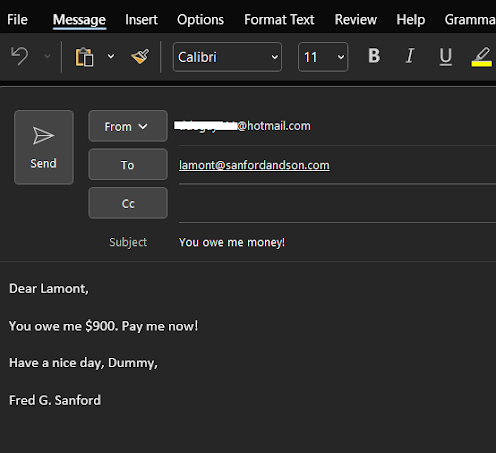
This email has no message, meaning you shouldn’t send it. That’s nice, but there’s a high risk of sending an email that makes no sense. We can do better with a macro.
How To Create a Macro in Excel
In the next section, you’ll see how you can work with Excel macros within the VBA editor. But there’s a much easier way to create macros to automate repetitive tasks. You can use the “Record Macro” option shown in the ribbon.
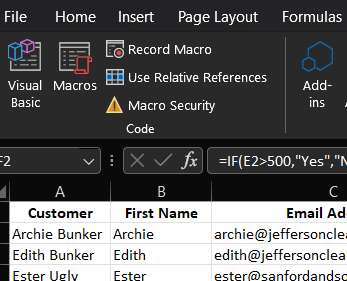
Click the Record Macro icon. Then go through the tasks you want to automate. While you’re going through the tasks, you’ll see “Stop Macro” instead of “Record Macro.” When completed, click the Stop Macro icon. Now you have a Macro. You can view the code for the macro in the VBA Editor that we show in the next section.
Use an Excel Macro To Send Email
In this example, instead of sending emails to customers based on how late they are, we’ll send emails based on how high their balance is. See the spreadsheet below.

You’ll notice we need fewer columns for the macro version. That’s because we handle the heavy lifting in the visual basic for applications (VBA) editor. In this version, you must select the cell where the “send” button is and only after that can you click the button.
If you click the send button for a row where the nudge column says they do not need a nudge, the send button will do nothing. But if you select the cell and then click the button where the nudge column says “Yes,” it works. That’s a better safety measure than the formula driven version where you could accidentally send an email with no message.
If we click the button for the row for Lamont Sanford, we get the following Outlook box:
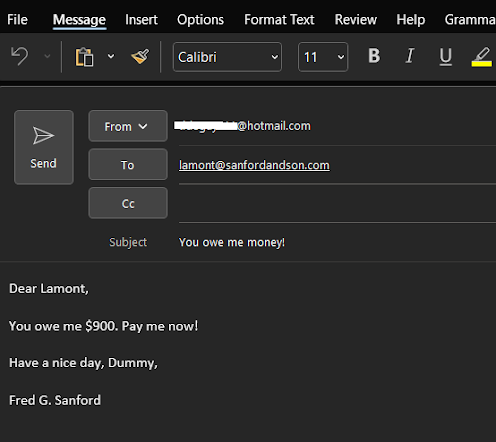
As you can see, this email falls into place better than the formula-driven email. But how did we do it? See the code below:
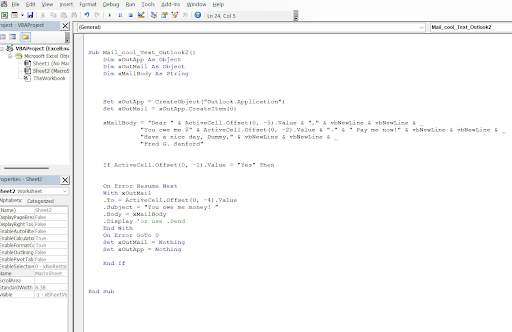
Let’s go through the steps for how the core parts of this code works. We’ll start with the sixth line where it says “xMailBody.” That’s where we generate the body of the email. Remember, you must select the cell where the button is before you click the button. When you select the cell, it becomes the “Active Cell.”
At the start of the xMailBody line, you’ll see “Dear” just as in the email’s start. There’s a space between “Dear” and the closing quotation mark, so there will be a space between “Dear” and the person’s name. But there’s no name here.
The line, “ActiveCell.Offset(0,-5).Value,” picks the name to use. This means the value comes from an offset from the active cell that’s on the same row (since it’s zero) and five columns to its left (since it’s -5). If you look back at the spreadsheet, you see the cell that’s five cells to the left of the active cell on the “Lamont Sanford” row has “Lamont” as its value.
Now, we have another ampersand to connect to the next part. It’s the comma after the name in the salutation. There’s another ampersand, then the word vbNewLine, which provides a line break each time you see it.
The next line, “If ActiveCell.Offset(0, -1).Value = “Yes” Then” tests a condition to see if we should send an email. If the value in the F column isn’t “Yes,” you can’t send an email. The formula that decides whether it’s a yes or no is IF(E2>500,”Yes”,”No”). Since Archie and Lamont both owe over $500, they should get an email.
The “.To = ActiveCell.Offset(0, -4).Value” line means the email will go to the address in the cell that’s four columns to the left of the cell where the send button is. The zero in the offset means it must be a value in the same row. Four columns to the left is where the email address is.
The “.Subject = “You owe me money! “” is self-explainable. Then the “.display” is what brings the Outlook window up.
Conclusion
The macro-driven version shown here is great for small batches. But if you want to handle batches of over 100 recipients or you want several options based on different conditions, it’s time for a custom-built solution. We would like to build that solution for you. Contact our team to schedule a free consultation by calling 1-833-349-0064.
